")

Introduction
If your project site lies in a seismic region, there’s a real and measurable risk that the soils beneath your foundations could lose strength during ground shaking.
Buildings supported on shallow footings and even pile systems can be affected. Deep foundations are not immune.
This article breaks down what soil liquefaction really is, how it happens, and what engineers can do to prevent a temporary loss of soil strength from becoming a permanent loss of structural integrity.
What Is Soil Liquefaction?
Liquefaction occurs when saturated, loose soils temporarily lose strength and stiffness due to earthquake shaking.
As pore water pressure rises during seismic loading, it can approach the stress that holds soil particles together.
Once the particles lose contact, the soil mass behaves like a fluid instead of a solid.
Three conditions generally need to exist:
- Loose, granular soils such as sand or silt.
- Saturated soils below the ground water table.
- Strong seismic shaking capable of increasing pore pressure.
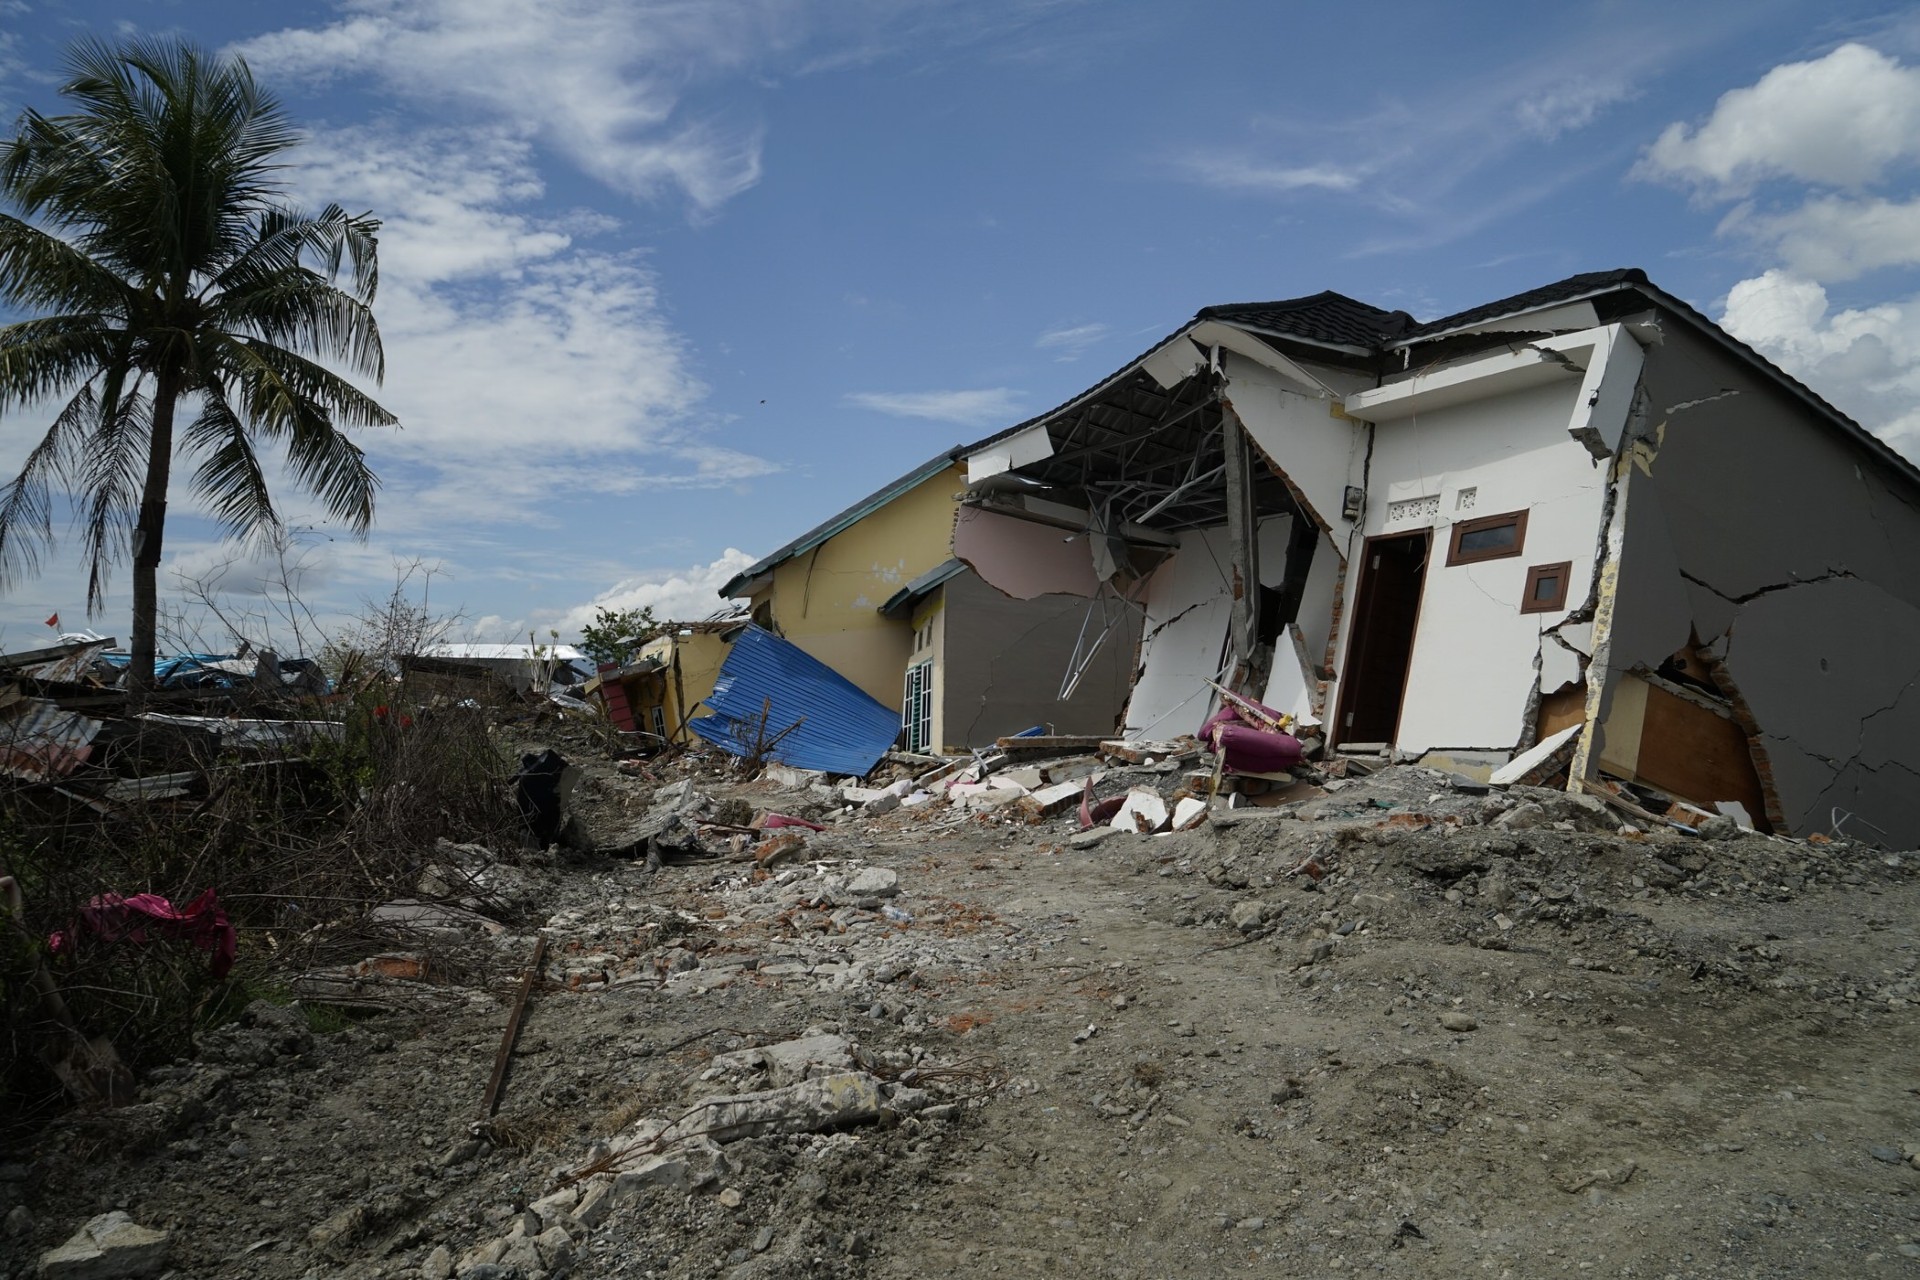
When those align, the soil beneath a structure can behave like quicksand — causing tilting, settlement, or lateral spreading.
Why It Matters for Foundations
When liquefaction occurs, the ground’s ability to support loads can drop dramatically.
- Shallow foundations may experience differential settlement or total bearing failure.
- Pile-supported structures can lose lateral support, resulting in buckling or rotation.
Ignoring the risk doesn’t make it go away — it only pushes the cost and complexity of mitigation into the future.
Recognizing and Evaluating Liquefaction Potential
Liquefaction risk is identified through geotechnical investigation and testing, which can include:
- Cone Penetration Testing (CPT): Measures soil resistance and stratigraphy to estimate relative density.
- Standard Penetration Testing (SPT): Helps assess the compactness and relative density of granular soils.
- Groundwater profiling: Determines if conditions exist for water-saturated zones beneath planned structures.
- Seismic hazard mapping: Assesses regional and site-specific earthquake risks.
If the results indicate loose, saturated granular soils with a seismic trigger potential, liquefaction mitigation must be considered in design.
Liquefaction Mitigation Techniques
Mitigation strategies aim to either reduce pore pressure buildup, increase soil density, or both.
The right approach depends on the soil type, site constraints, and design loads.
1. Densification and Reinforcement
- Vibro-Compaction: Uses a vibrating probe to densify clean sands and gravels, improving stiffness and resistance to liquefaction.
- Vibro-Replacement (Stone Columns or Aggregate Piers): Creates dense, vertical stone inclusions that strengthen the ground and provide drainage paths.
- Dynamic and Rapid Impact Compaction: Involves controlled, repeated impacts to densify shallow soils and fills.
2. Drainage and Pore Pressure Control
- Vertical Drains (Wick Drains): Create pathways for water to dissipate more quickly, reducing excess pore pressure during shaking.
- Preloading: Applies a temporary surcharge to accelerate consolidation before construction.
- Gravel or Sand Drains: Installed to promote drainage and reduce the risk of trapped pore pressure during seismic events.
3. Cementation and Soil Modification
- Grouting: Injects material to fill voids and bind soil particles, improving strength and reducing compressibility.
- Deep Soil Mixing (DSM): Mechanically blends cementitious binders with native soils to form strong, low-permeability “soilcrete.”
- Chemical Stabilization: Uses lime or cement to improve the strength and stiffness of clayey soils, indirectly improving seismic performance.
Many projects combine densification with drainage to tackle both root causes — loose soil structure and pressure buildup — simultaneously.
Design and Construction Considerations
An effective liquefaction mitigation plan is never “off the shelf.”
It’s customized through detailed analysis, experienced design, and careful execution. Key steps include:
- Accurate soil characterization – identifying which layers require treatment.
- Performance-based design – matching improvement depth and spacing to expected seismic loads.
- Quality assurance – verifying compaction energy, material gradation, and installation methods.
- Instrumentation and monitoring – tracking pore pressures and settlements during and after installation.
Design quality matters. Two identical mitigation methods can produce vastly different outcomes depending on who designs and oversees them.
The Cost of Doing Nothing
Skipping liquefaction mitigation may save a few percentage points on the construction budget, but the long-term risks can be catastrophic.
Settlement, foundation tilt, and lateral spreading can render a building unsafe or unusable.
Repairing a structure after liquefaction can cost ten times more than designing it correctly from the start.
Early collaboration with an experienced geotechnical design-build team allows owners and contractors to balance performance, cost, and schedule without unnecessary overdesign.
Conclusion
Liquefaction is one of the few geotechnical hazards that can turn solid ground into a temporary liquid — but it’s also one of the most preventable.
With proper investigation, thoughtful engineering, and proven ground improvement techniques, the risk can be managed effectively and economically.
Contact Garbin GeoStructural Group today to discuss your project, evaluate liquefaction risk, and implement tailored mitigation solutions that protect both your site and your investment.
